隅见录
PAGE_NAME
文章
隧道
分类
标签
友链
留言板
关于
隐私政策
免责声明
微信
支付宝
互动
最新评论
正在加载中...
兴趣点
寻找你感兴趣的领域
Linux提权
3
六爻占卜
1
其他
3
内网渗透
10
密码抓取
2
应急响应
3
流量分析
3
渗透测试
17
社会工程学
1
网络协议
3
逆向
1
靶场
15
文章
归档
三月 2025
1
篇
二月 2025
5
篇
一月 2025
4
篇
十二月 2024
2
篇
十一月 2024
13
篇
十月 2024
6
篇
九月 2024
2
篇
0
404
请尝试站内搜索寻找文章
回到主页
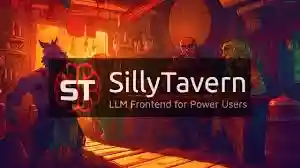
酒馆 SillyTavern 简单使用
2025-03-05
Windows九大权限
2025-02-26
WMI横向
2025-02-25
基于 DCOM 的横向移动
2025-02-24
PsExec 横向
2025-02-22
AI也懂卦象?DeepSeek六爻测算初体验
2025-02-08
文章
33
标签
12
分类
2
功能
显示模式
网页
博客
项目
安知鱼图床
文章
隧道
分类
标签
友链
留言板
关于
隐私政策
免责声明
标签
Linux提权
3
六爻占卜
1
其他
3
内网渗透
10
密码抓取
2
应急响应
3
流量分析
3
渗透测试
17
社会工程学
1
网络协议
3
逆向
1
靶场
15
繁
复制选中文本
粘贴文本
引用到评论
新窗口打开
复制链接地址
复制此图片
下载此图片
新窗口打开图片
站内搜索
百度搜索
播放音乐
切换到上一首
切换到下一首
查看所有歌曲
复制歌名
随便逛逛
博客分类
文章标签
复制地址
关闭热评
深色模式
轉為繁體
通知
你好呀